

Windows 10’s Live Tiles in the Start Menu can be a very quick and easy way to see information from an app without having to open it. For example, you can see incoming emails, messages, or news headlines at a glance. Sometimes you want to manage Live Tiles though, perhaps to see more information, to resize the tile, or to turn the live functionality off completely. You can right click (touch and hold) on any tile in the Start Menu to display a menu of options. These include unpinning the tile from the Start Menu to remove it, resizing it, and more. There are four different sizes for tiles, and not all apps support them all, but when you select Resize you will be shown what sizes are available for you for that tile. 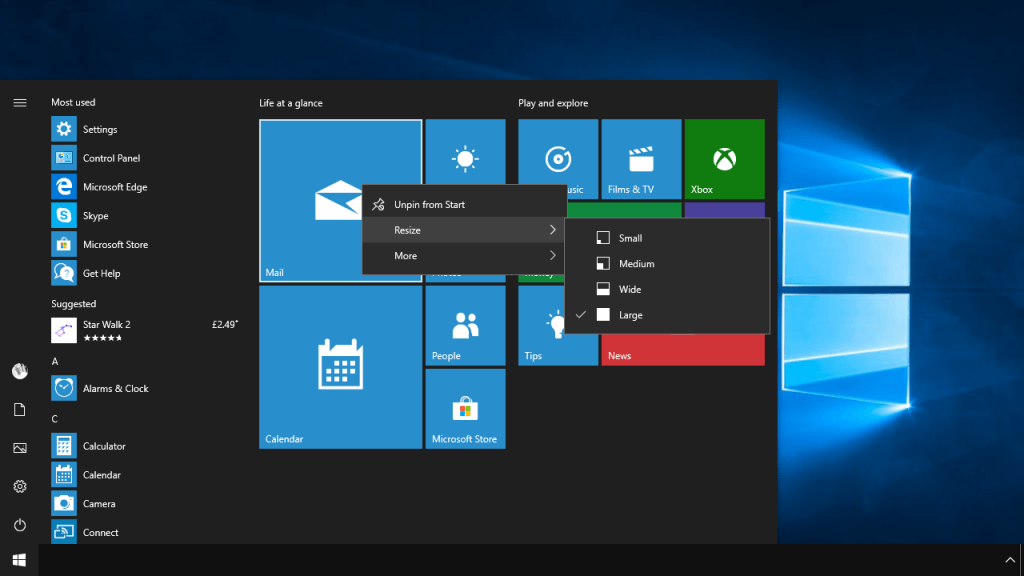 The More menu is where you go to turn Live Tile display functionality on or off. You might, for example, want the finance app pinned to the Start Manu, but not have it display the latest share prices. Here you can also perform additional operations such as pinning the app to the desktop Taskbar and opening settings and configuration options for the app.
 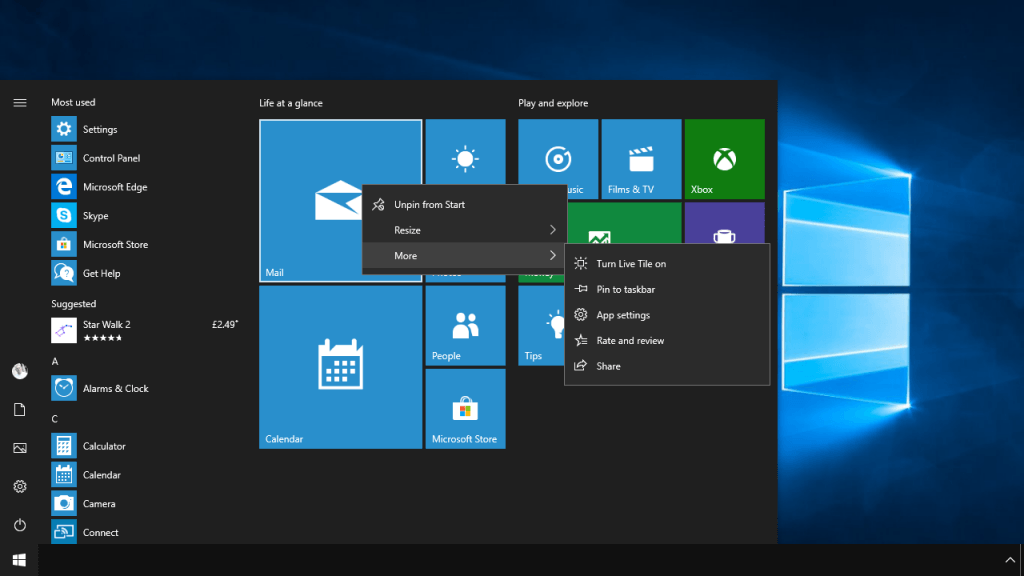 It’s simple and straightforward to control tiles in the Start Menu. You can simply drag and drop them around in the Start Menu to rearrange them, and also separate them into groups by pulling one away from the tile group it’s currently associated with. Microsoft have certainly made Start Menu customisation simple with Windows 10.
Learn how to maximise your productivity with Windows 10, Mike Halsey’s book “The Windows 10 Productivity Handbook” is on sale now from Apress, Amazon, and all good booksellers.