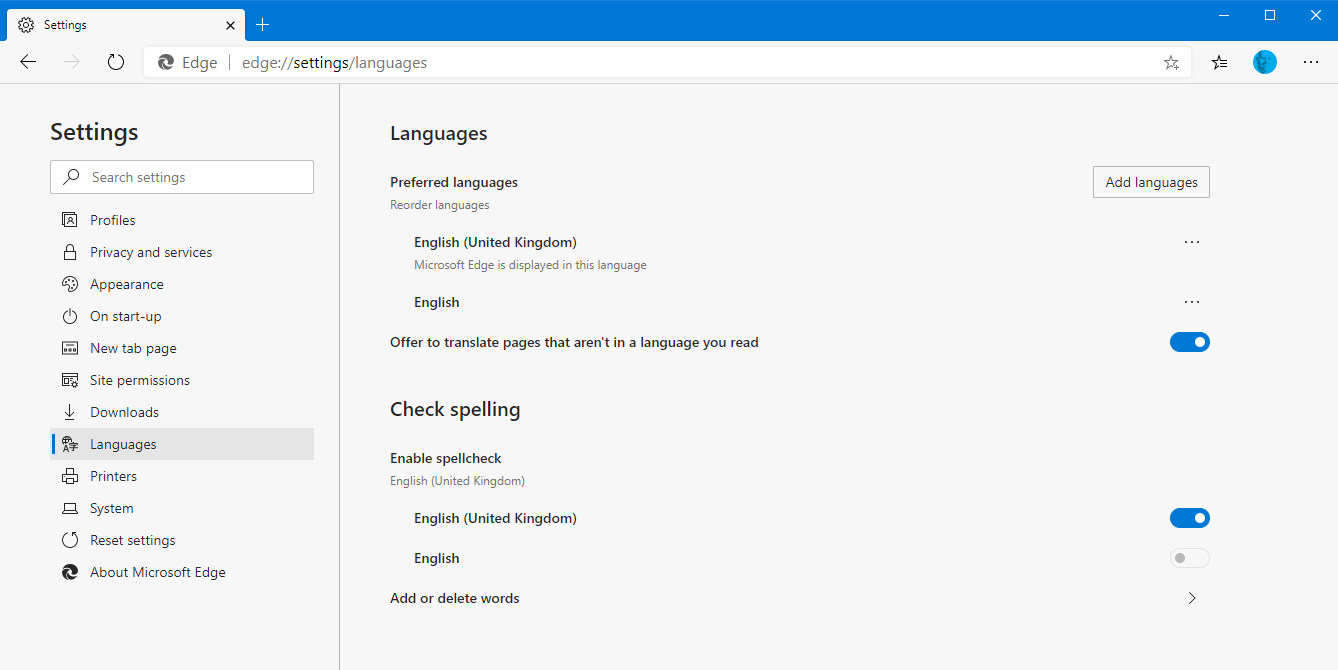
Microsoft’s Edge browser gives you full control over the languages used and installed in the browser, and that are also used for automatic spell-checking when you type into web forms. To access the language settings, open the main menu in Edge by clicking the menu icon (⋯) in the top right of the window, and then from the menu that appears, click Settings.

When the Settings tab opens, click the Languages link on the left side and various options will appear to you. Perhaps most useful of these is the spell-checking options. Many people don’t like spell checking in their browsers, especially if they’re checking in an incorrect language, such as US English if you’re in the UK. You can turn spell-checking off for any language by simply changing its switch to the right side of the language name.

If you click the Add languages button near the top right of the window then a pop-up list will appear of all the languages available to you in the browser. All you need to do it check the language(s) you want to add and click the Add button.

Additionally, in the main language settings there is a menu icon (⋯) to the right of each installed language. You can click this to get an option to remove a language from your browser. Bear in mind though that you must have at least one language installed, so you might need to add a new language before removing an unwanted one.


