

If you use virtual machines in Hyper-V in Windows, then you may occasionally need to make a change that might need to be safely undone, perhaps because you’re testing something. Hyper-V comes with a feature called Checkpoints that allows you do do this at any time.
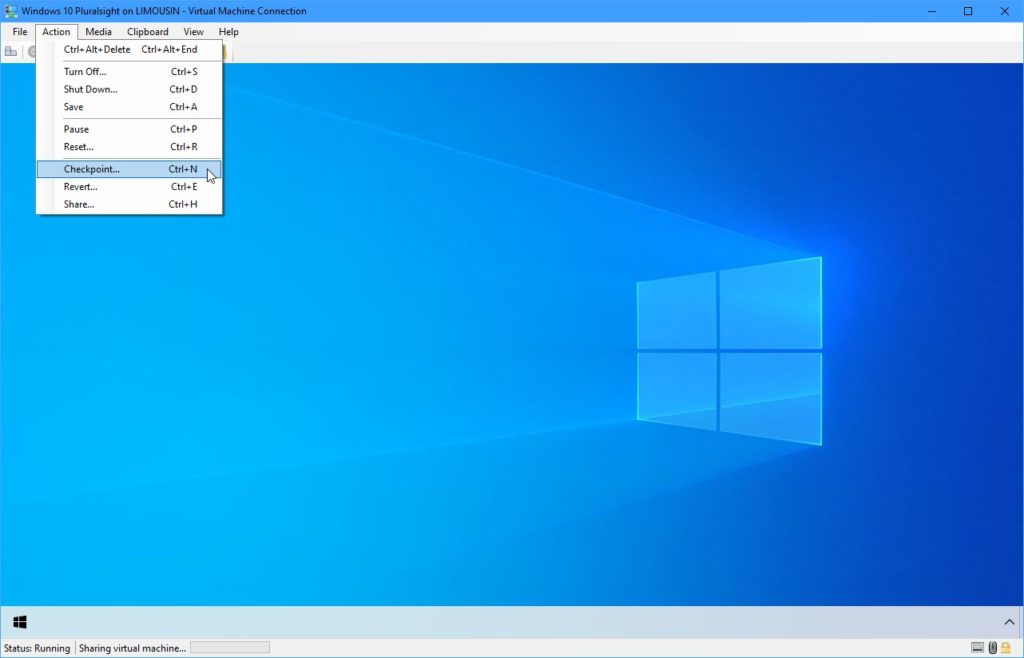
Checkpoints are snapshots of the VM at the time they’re taken, a bit like System Restore works within Windows itself. There are two ways to create a Checkpoint. The first is when the VM is running, open the Action menu and then click Checkpoint in the menu that appears.
Alternatively you can select the correct VM in the Hyper-V management console and then click the Checkpoint link in the bottom right corner of the window.

Checkpoints can be restored at any time using both of these methods, but by instead clicking the Revert option. You will be asked which Checkpoint you wish to restore, and these are seen in the centre of the Hyper-V management console when the VM is selected. Reverting a Checkpoint will restore the VM to the state it was in at the time that Choeckpoint was created.