If you are using Windows 11 Home on your PC, you might decide that you want to upgrade to Windows 11 Pro instead. There are three main reasons for wanting to do this…
- You might want to encrypt your files and documents on the PC with Microsoft’s Bitlocker full disk encryption utility, which is not available in Windows 11 Home
- You do not need to sync files and documents to the cloud, only ever use one PC, and want to create a local account, so you’re not forced to use a Microsoft Account
- You need some of the features that are only available in Windows 11 Pro to make the PC operate effectively with your workplace, such as the Remote Desktop feature
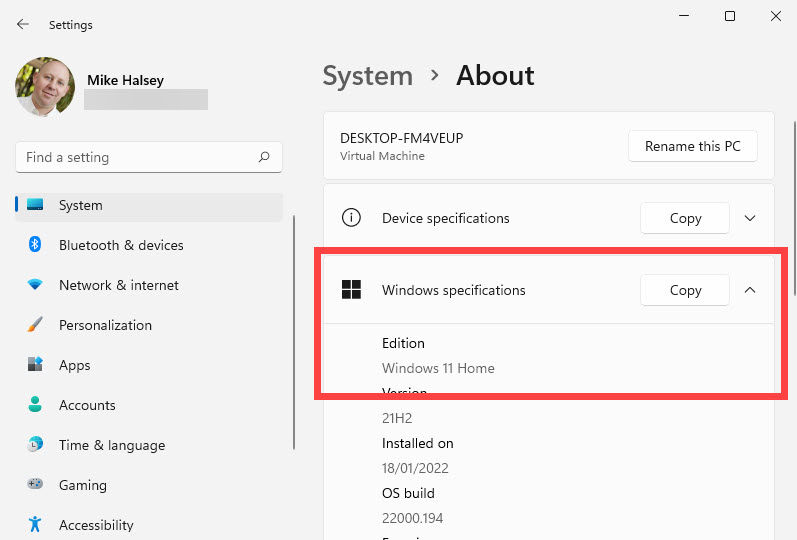
You can check which version of Windows 11 you are using in Settings by clicking System and then About. You will see your “Windows Edition” listed in the Windows specifications section.

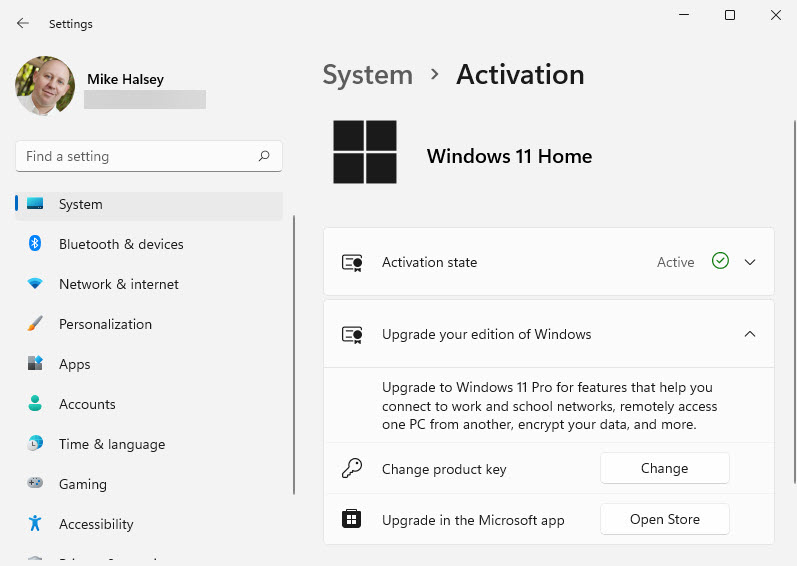
To upgrade your version of Windows 11 Home to Windows 11 Pro, in Settings, navigate to System then About and finally Product key and activation. If you already have a product key for Windows 10 Pro you can enter it here. Otherwise in the Upgrade your edition of Windows option, click the Open Store button.

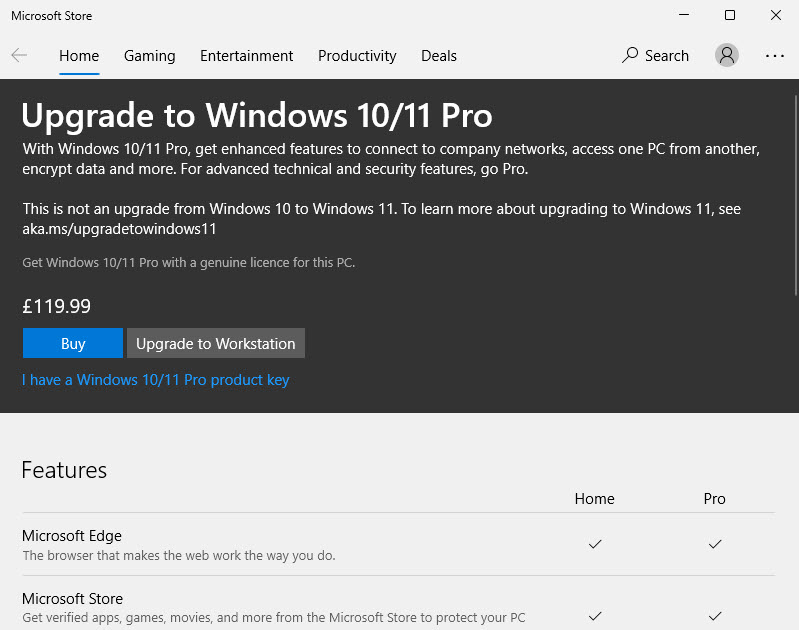
You will be taken to the Microsoft Store and shown how much it will will cost to upgrade your copy of Windows. You can make the purchase through the store using your bank or credit card.

When you have completed your purchase of a Windows 11 Pro licence, the Store will automatically upgrade your edition of Windows for you. Note that your PC may need to restart during this process so make sure you have saved any work you have open.
Learn how to find your way around Windows 11, make it easier to use, and how you can get more done with your PC with Mike Halsey’s book “Windows 11 Made Easy“, now on sale from Apress, Amazon, and all good book sellers.


