Sometimes you might find that the user account on your PC has become corrupt and you can’t sign into the PC. This can be a problem, but it doesn’t mean that you’re locked out forever. If you have a second account on the PC (it needs to be an administrator) then you can sign into that, create yourself a new account, and then bring your files and documents over to that new account, and skip to Step 3 in these instructions for how to do this.
Step 1: Open Command Prompt
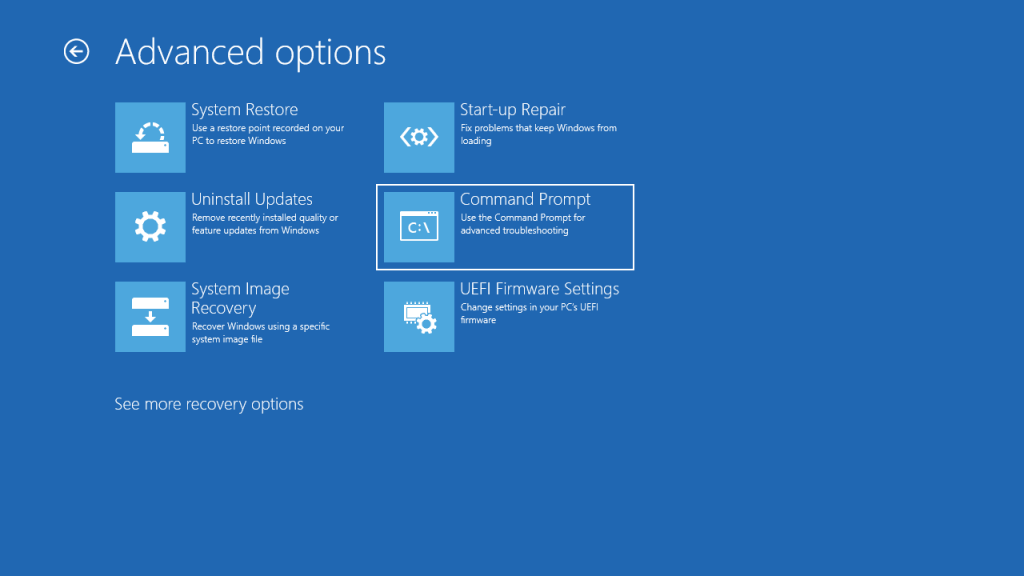
If you need to sign into your PC however, restart the PC into the recovery options; this is best achieved by holding the Shift key and clicking Restart from the sign-in screen. When you are in the Recovery Options screen, clickTroubleshoot > Advanced Options > Command Prompt where you can unlock the hidden Superuser account.
NOTE: If you are activating the Superuser account from the Windows desktop, Search in the Start Menu for cmd and when Command Prompt appears in the results, right-click on it and click Run as Administrator from the context menu that appears.
Step 2: Unlock the “Superuser” account
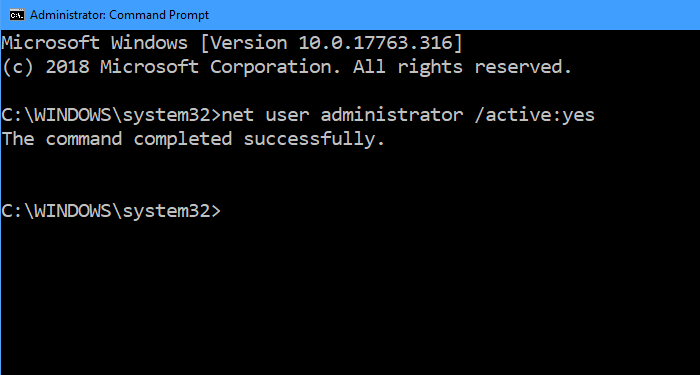
Once you are at the Command Prompt you need to unlock the hidden superuser administrator account that comes with all Windows installations, but is hidden by default. To unlock this account, at the Command Prompt, type net user administrator /active:yes and press the Enter key.
Step 3: Create a New User Account
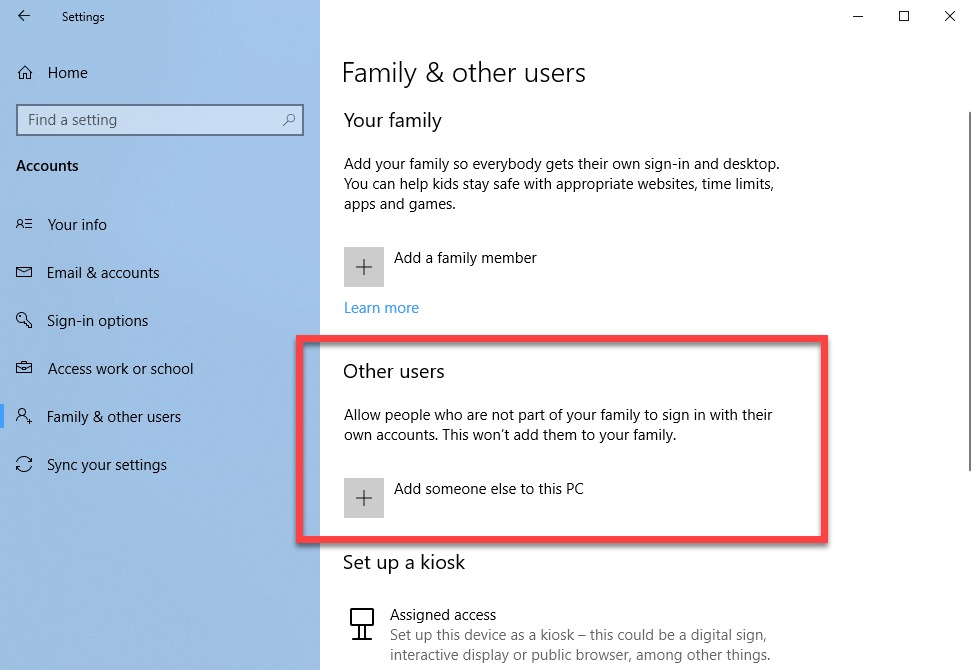
With the Superuser account active, restart the PC and sign in using that account, you won’t need a password. In Windows 10, when you are at the desktop open Settings from the Start Menu, and navigate to Accounts > Family & Other Users. Here you can create yourself a new account (remember to make yourself an Administrator so you have permission to install software and make changes to the PC).
Step 4: Hide the “Superuser” Account
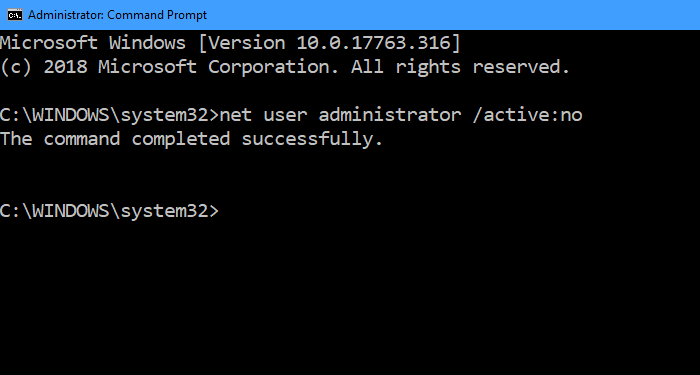
Next, reopen the Command Prompt by searching in the Start Menu for cmd and when Command Prompt appears in the results, right-click on it and click Run as Administrator from the context menu that appears. Type net user administrator /active:no and press the Enter key. This will hide the Superuser account again.
Step 5: Move your Files and Documents to the New Account
Restart the PC and sign into your new Account. You will now need to copy your files and documents from your old account to your new one. To do this, open File Explorer and navigate to Local Disc (C:) > Users > [YourOldUserName] where you will see all the file and document folders for that old account. Select the ones you want (by holding the Ctrl key on your keyboard when you click each one, and then right-click the mouse and select Cut from the context menu that appears, also available by pressing Ctrl+X.
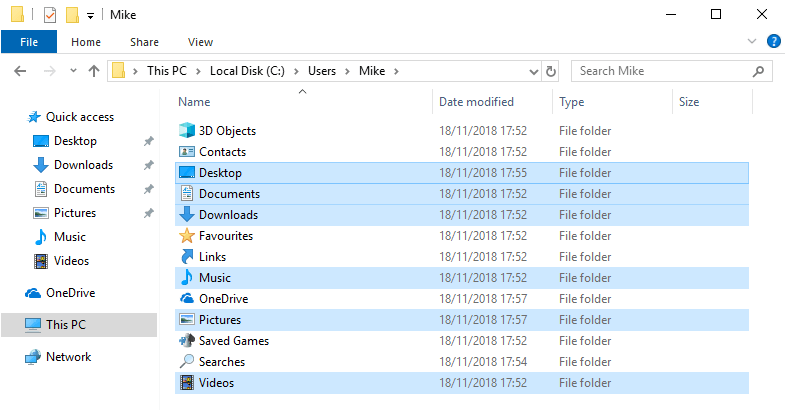
Navigate to Local Disk (C:) > Users > [YourNewUserName} and right click in any blank space. You can now click Paste from the context menu that appears. This can also be done by pressing Ctrl+V on your keyboard. The files and documents from the old account will be copied to your new user account.
NOTE: You may be asked to “take ownership” of the files when they are copied. This sets appropriate security tags on each file, so that you can open, read, and write them under the new account.
The final step, once you have confirmed that you have recovered all your files and documents, is to open Settings > Accounts > Family & Other Users and delete the old account that’s no longer needed.
For in-depth Windows 10 Troubleshooting advice, Mike Halsey’s book “Windows 10 Troubleshooting, Second Edition” is on sale now from Apress, Amazon, and all good booksellers.


I can’t get into safe mode, but say “incorrect password”