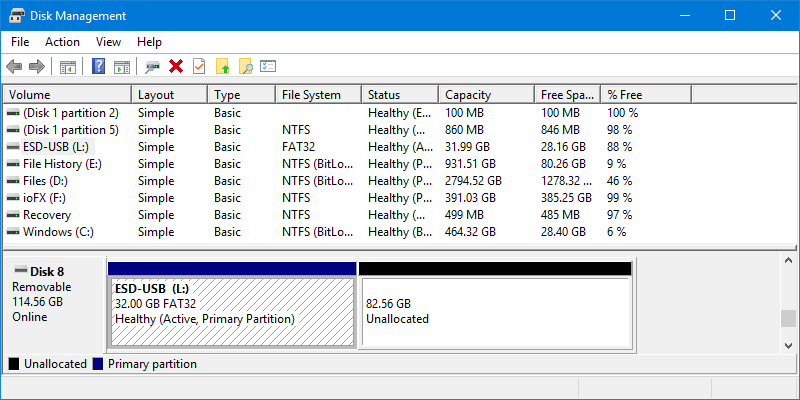
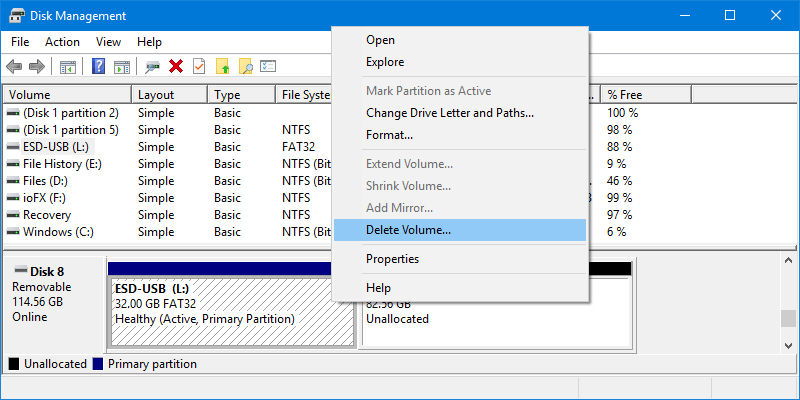
Sometimes you might find that you have a USB Flash Drive that’s the wrong size. For example you might have a 128GB Flash Drive that only has 16GB showing as its available size. This normally happens because the Flash Drive has been formatted by a tool such as the Windows 10 Installer, that only formats drives to a specific maximum size.  Fortunately this is quick and easy to fix. Note however this process will wipe all your files and data off the drive, so you should make a back up copy first. Search in the Start Menu for disk management and from the search results, click Create and format hard disk partitions. This opens the Disk Management console, and you will see all of your disks, including your inserted USB Flash Drive. Right-click on the displayed partition on the Flash Drive and from the menu that appears click Delete Volume. Again, be VERY careful not to delete the wrong partition, or one on another disk as all the data will be wiped.
  You now have a black, unformatted disk in the correct size. Right click again on it and from the menu that appears select New Simple Volume. A wizard will open that you can mostly just click through. You may want to give the drive a name though, or choose the formatting type; NTFS for PC only use, or ExFAT to maintain compatibility with Apple Mac computers, and other non-Windows devices.
  With the formatting complete, you will find that you now have a USB Flash Drive with the correct available capacity filling the whole drive.
  It’s very quick and easy to fix misconfigured Flash Drives, but please remember to be careful as you don’t want to damage a critical partition, such as the one on which you store files and documents.
For in-depth Windows 10 Troubleshooting advice, Mike Halsey’s book “Windows 10 Troubleshooting, Second Edition” is on sale now from Apress, Amazon, and all good booksellers.


